
CarPeak - Vehicle Photography
Select the vehicle you want to photograph and click on the Commercial photos.
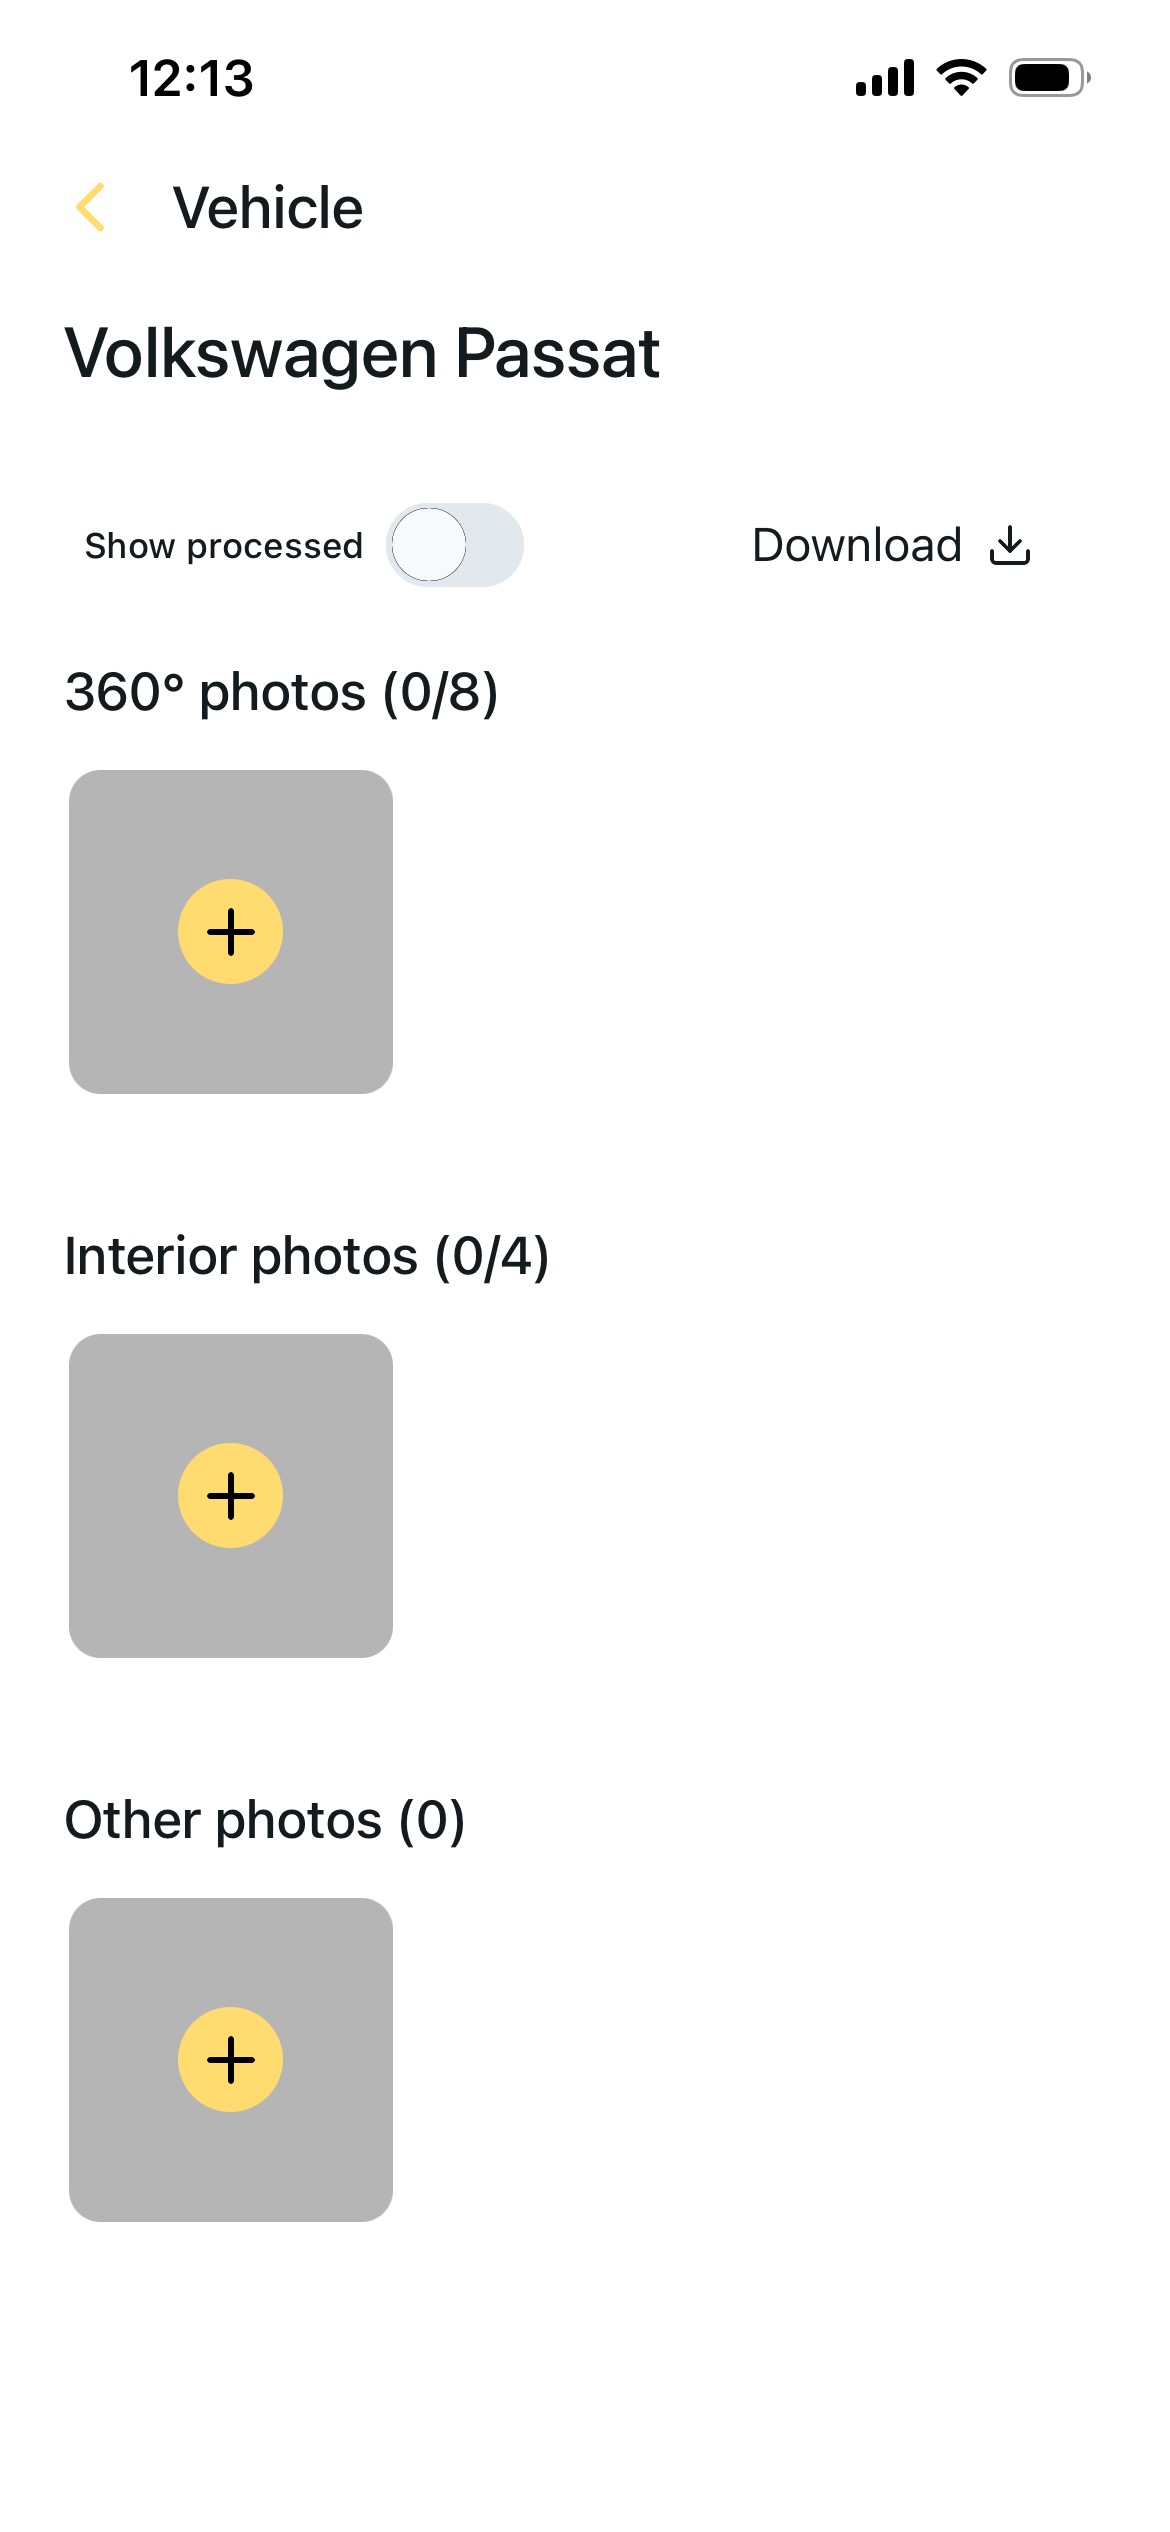
The entry point for capturing photos is the image gallery where all photos created with guided photography are displayed.
Photos are divided into:
- 360º photos (exterior)
- interior photos
- additional photos (Other photos) - optional images that are not part of the guided process
If the vehicle does not yet have photos, the gallery will be empty.
Tip: The appearance of the final photos (background, company logo, etc.) set in settings before starting the photography, as the images will no longer be automatically updated afterwards.
Guided photography
The app guides you step by step to create standardized and sales-effective vehicle images. To start, click the "plus" under the 360º photos gallery.
An overlay (guide frame) appears on the screen, showing the correct position of the vehicle.
- The vehicle must be aligned with the frame at each step.
- This ensures the correct composition of each photo.
- The app checks if the phone is aligned.
- When the vehicle is aligned, the red message turns green.
- You can capture the photo only when the alignment is correct (within the allowed range).
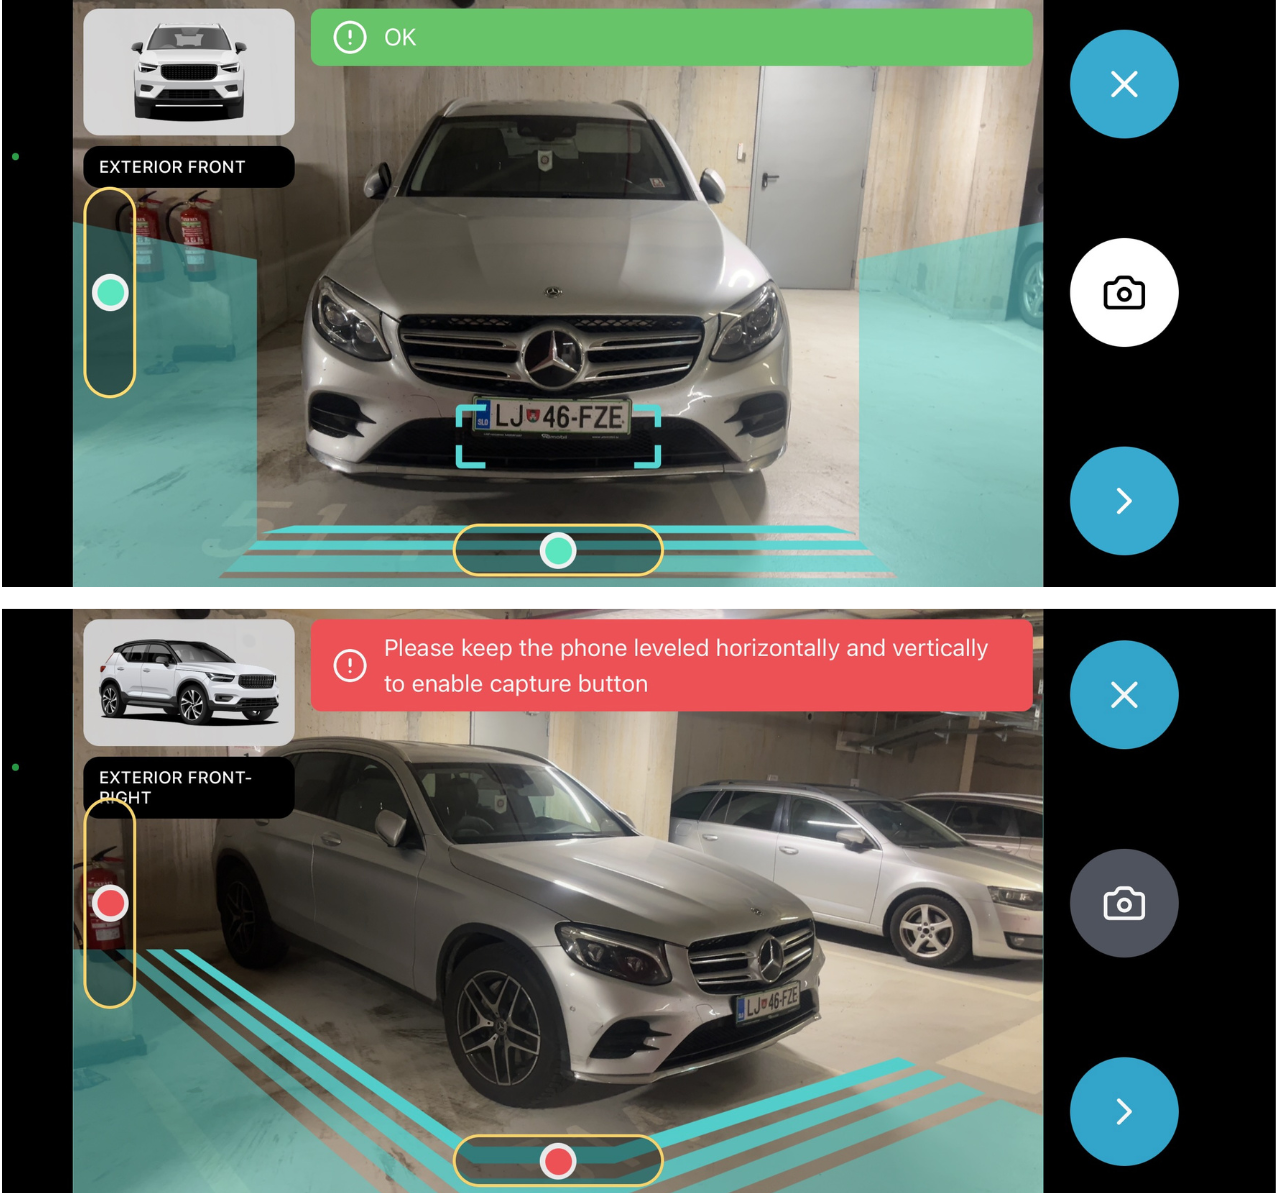
Tip: iPhone users must, before starting to take photos, in the phone settings disable Portrait orientation.
This process ensures:
- repeatability of photography
- uniform appearance of all vehicles
- professional image quality
Management and Navigation
- You capture the image with the camera button
- You can skip individual steps with the button ">"
- You can exit the process at any time with the button “X”
- Upon exiting, you return to the gallery where you manage all photos
Uploading and processing images
As soon as a photo is taken and you proceed to the next step or exit the process, the photo is automatically sent to the upload queue and then for processing.
You just take photos and everything else is done automatically.
You can monitor the image upload process in the vehicle image gallery or within settings
- Red indicator: an error occurred while uploading the vehicle. You must re-upload the vehicle.
- Blue indicator: the photo has been uploaded and is awaiting processing.
- Green indicator: the photo was successfully processed.
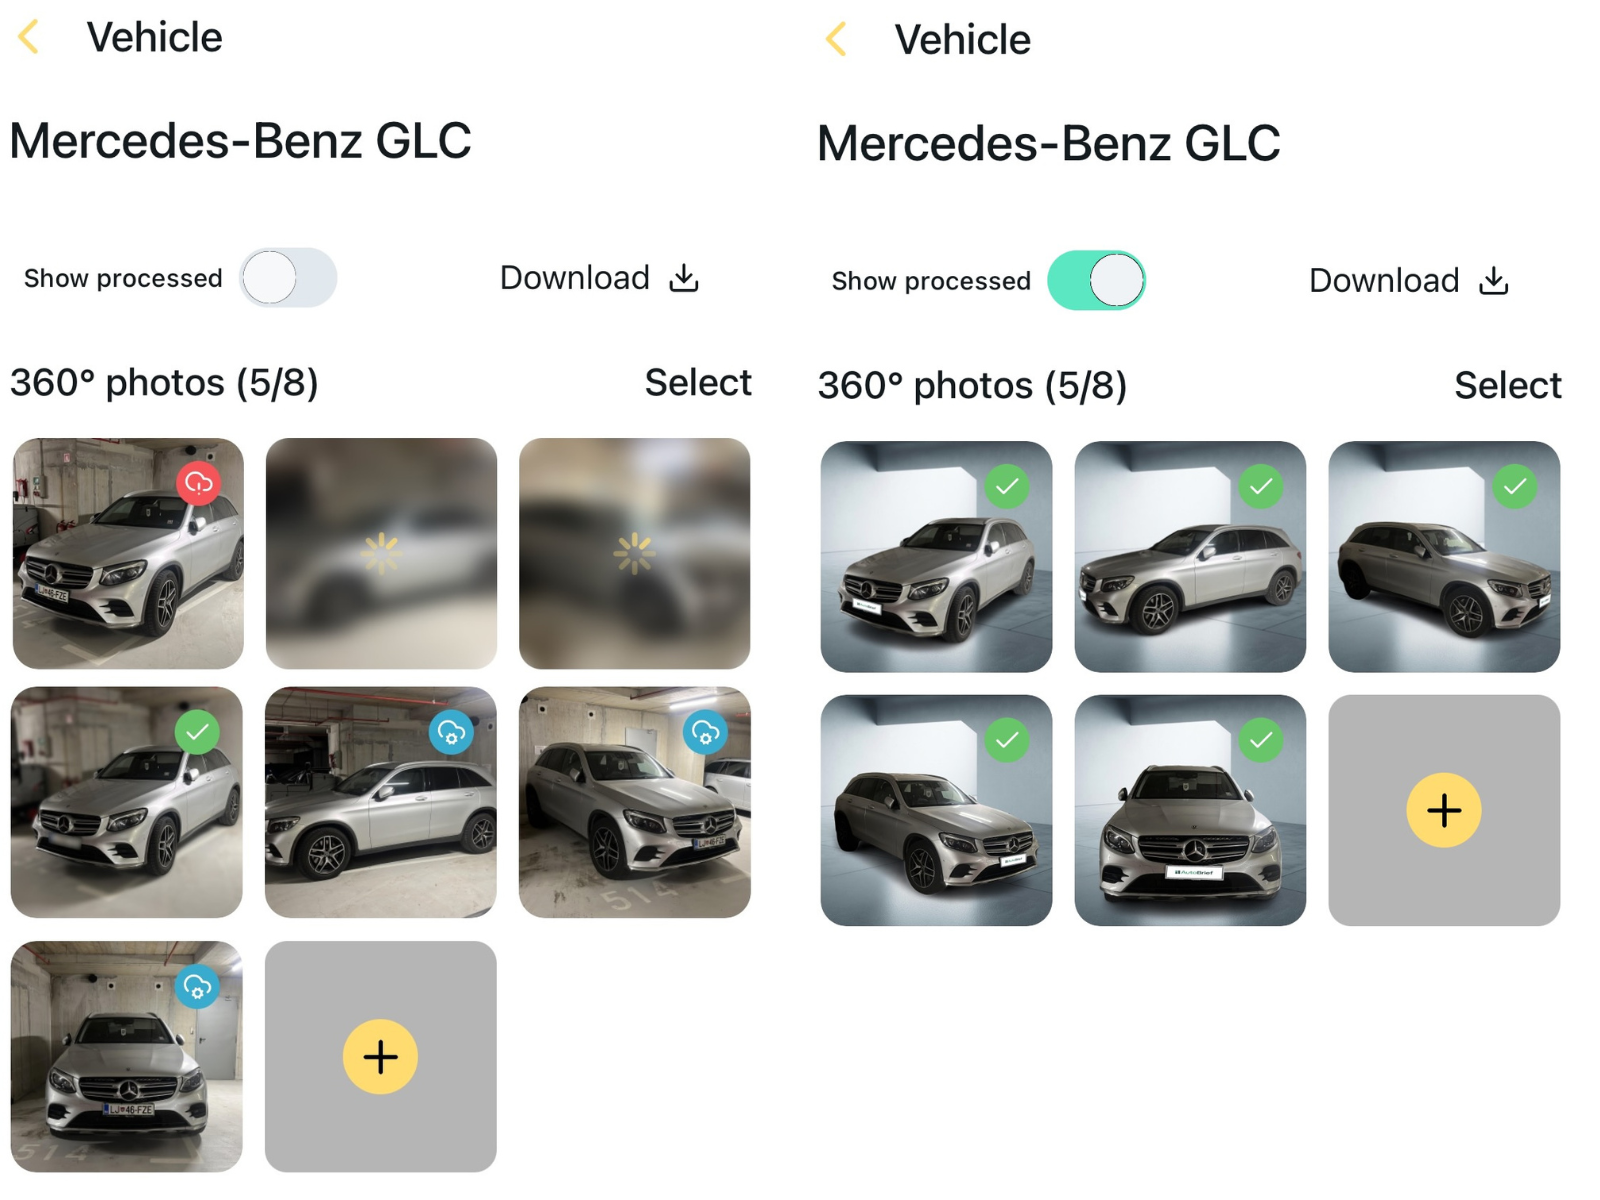
The button "Show processed" shows you the processed photos.
All edited photos in the gallery are automatically transferred to the vehicle located in the AutoBrief vehicle inventory. By clicking the "Download" button, you can also download them to your phone.
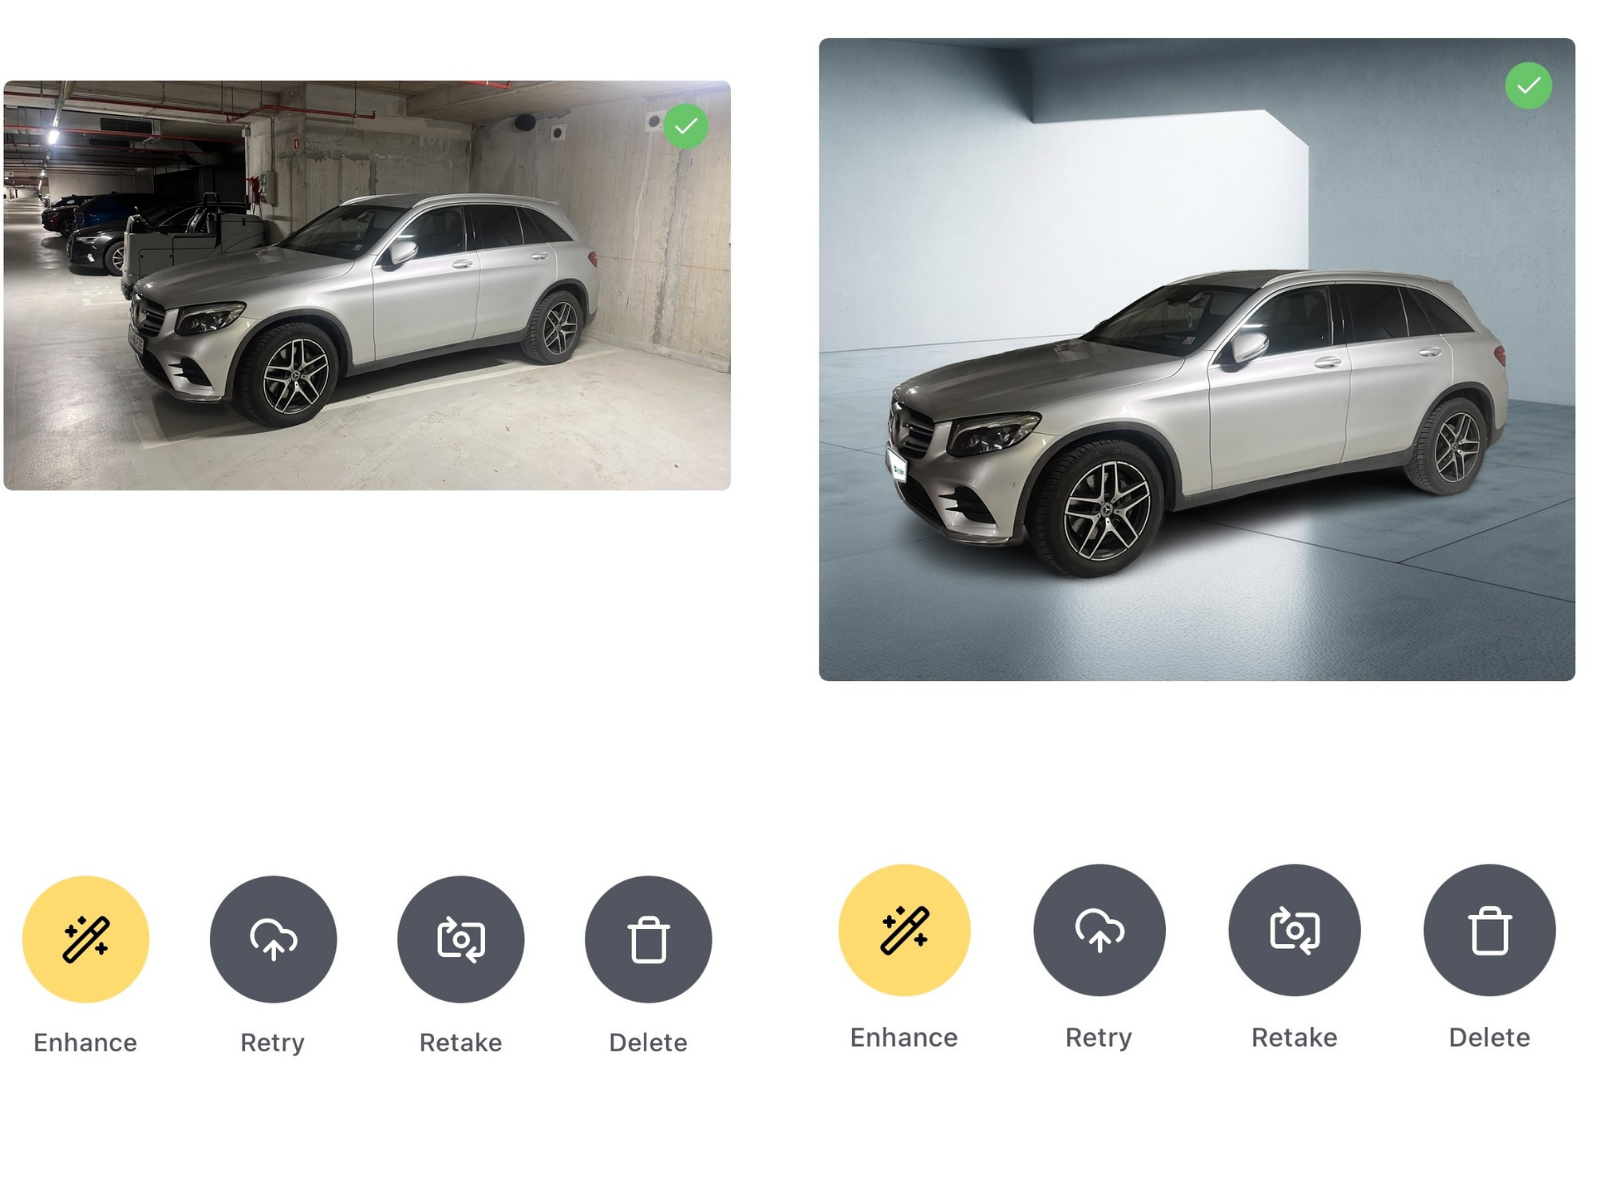
By clicking on an individual photo, more detailed settings for the selected image will open:
- Enhance: you can send the photo for processing.
- Retry: you re-upload the photo to the system (when a red mark appears next to the image during photo upload).
- Retake: Re-photograph the vehicle and replace the image with a newer version.
- Delete: delete the selected photo.
Offline mode
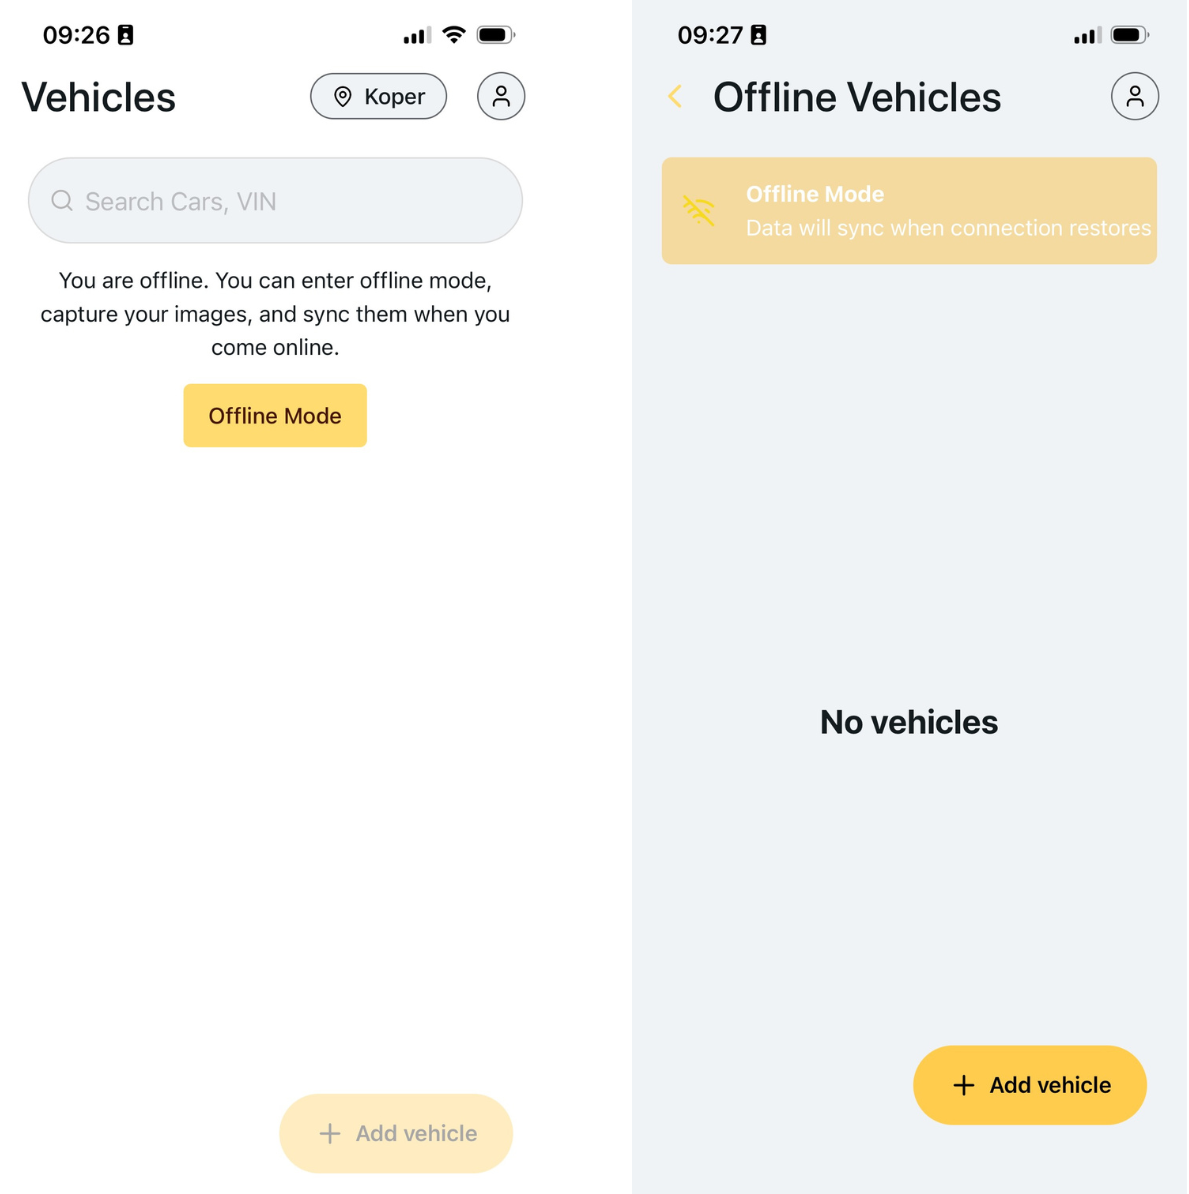
If you do not have an internet connection during photography, adding vehicles will be disabled. Therefore, "Offline mode" is available.
Offline mode offers the same vehicle entry and photo capture process. You can then add the vehicle to inventory or merge it with an existing vehicle in inventory once an internet connection is re-established.
Tip: If you want to automatically enable "Offline mode", just turn off your Wi-Fi connection and mobile data.
The app name has been changed from AutoBrief Companion to Carpeak.