
How to get started?
Using the AutoBrief platform is not difficult. For an easy start, we recommend following these steps.
1 - Edit profile settings
Start by editing your profile settings to avoid missing data and duplicating work.
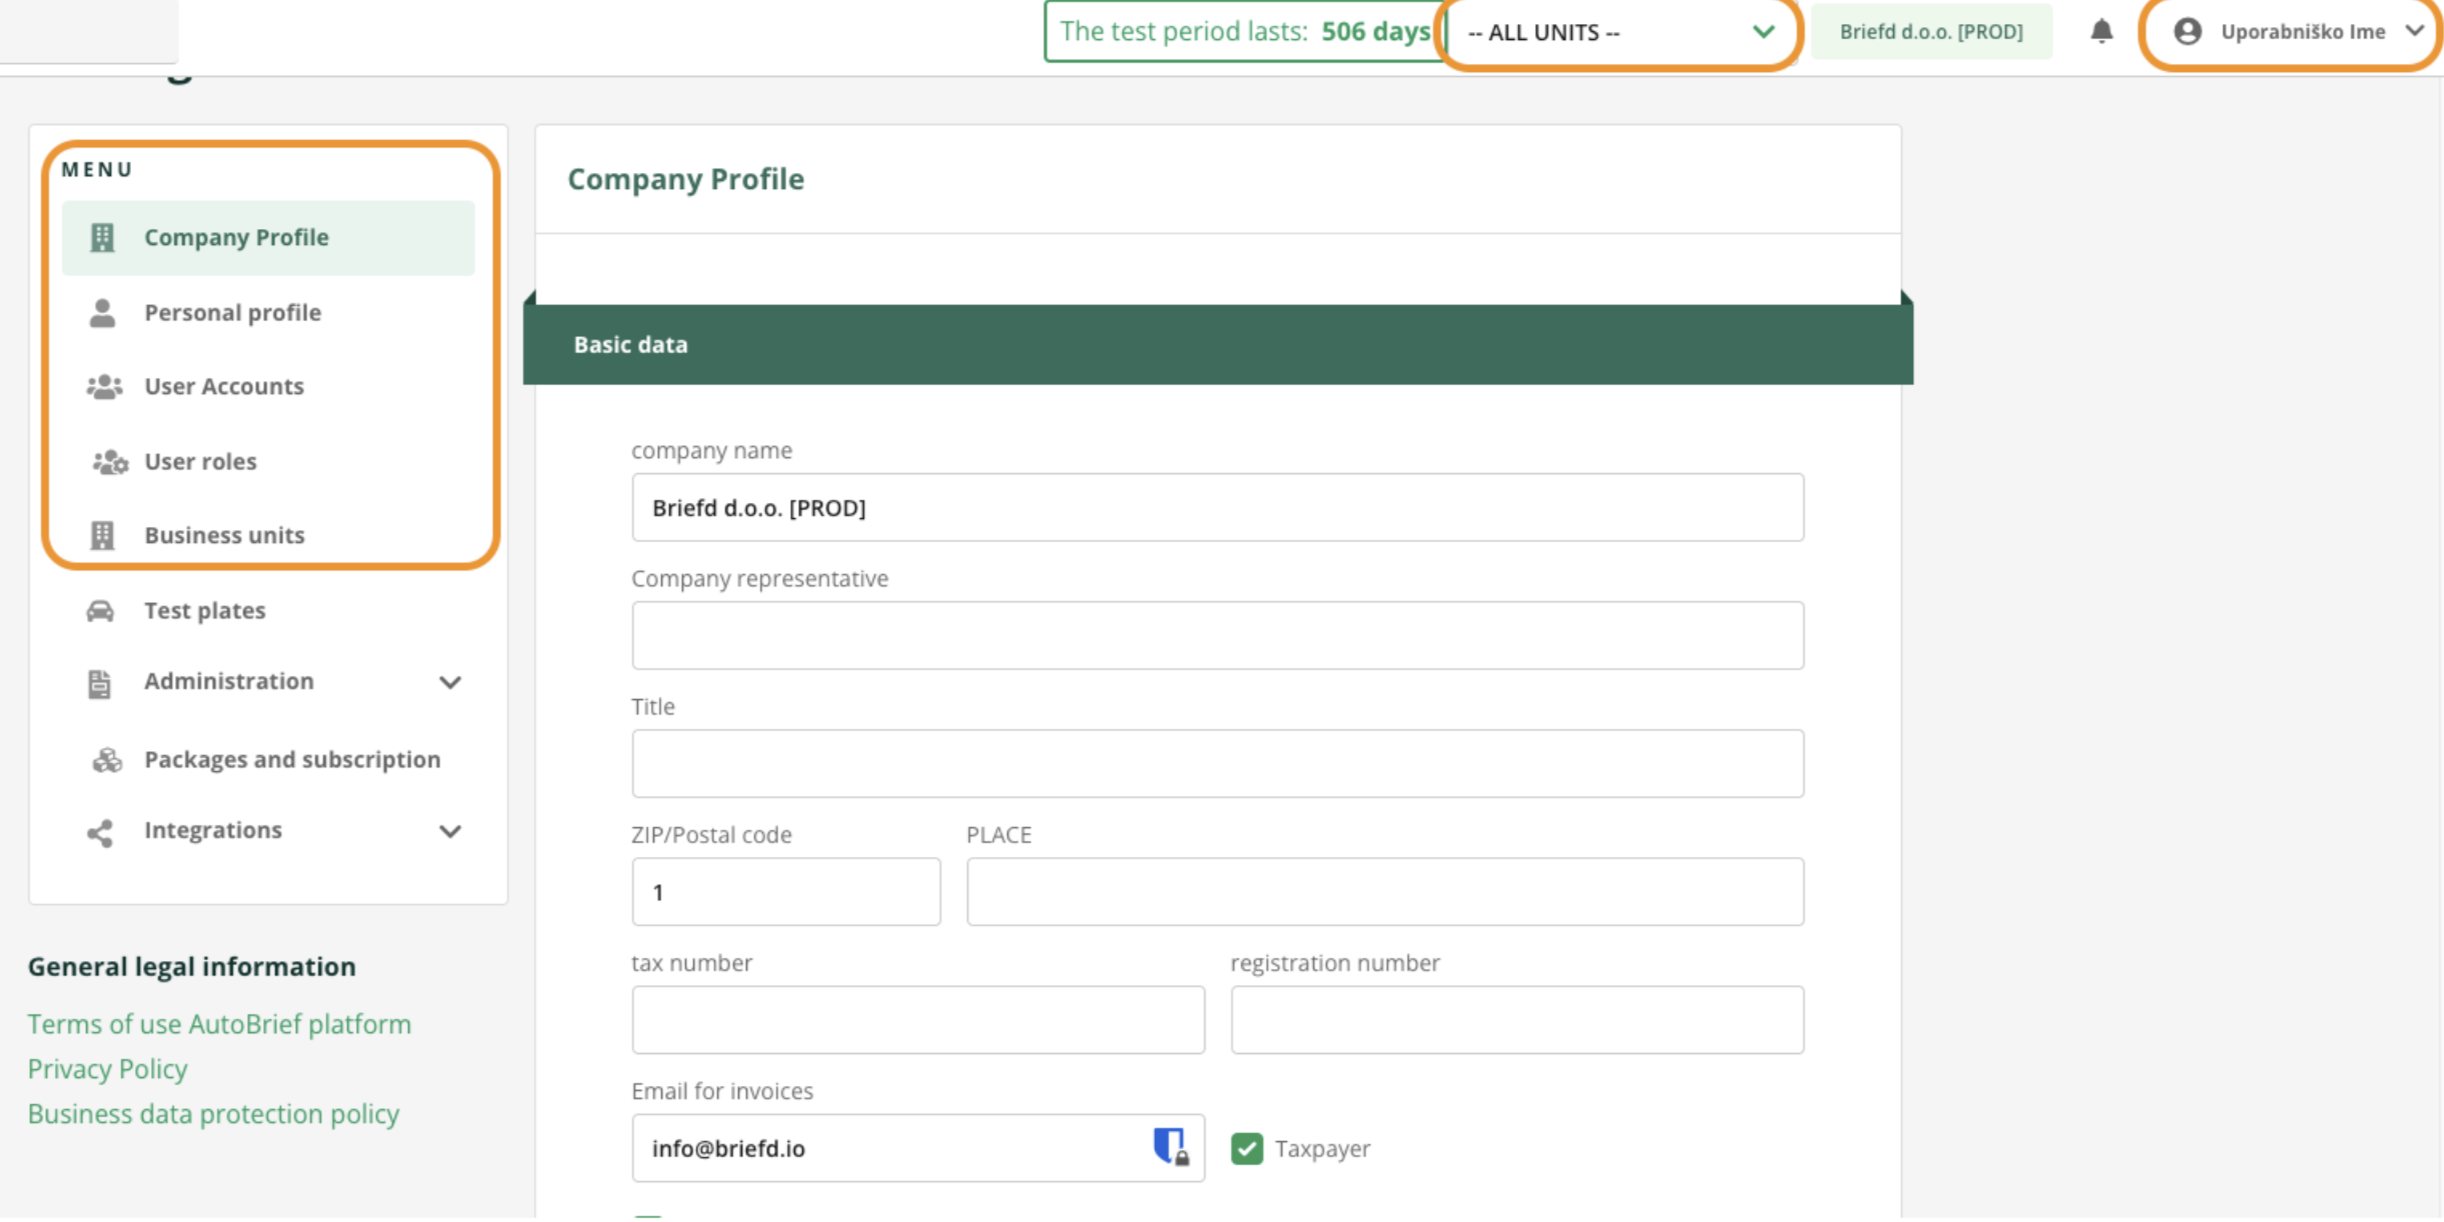
In the top right, click on your name and select Settings
- Fill in the data under the sections:
- Company profile
- Personal profile
- User accounts - invite colleagues to the team
- Business units
Tip: How to edit company settings in more detail can be found in the instructions Company Profile.
Under the Business Units section, we recommend adding all branches from the start if you operate in more than one location. This way, vehicles and data will be sorted into the correct unit from the beginning.

Instructions for setting up business units.
2 - Install the AutoBrief application
For faster access, download AutoBrief as an application to your computer and phone.
Application installation instructions.
3 - Activate access to vehicle auctions
Once the basic information is set up, we suggest activating the Vehicle Auctions module. Activation takes a few days, as company approval is required. After approval, you will have daily access to thousands of vehicles at auctions from all over Europe.
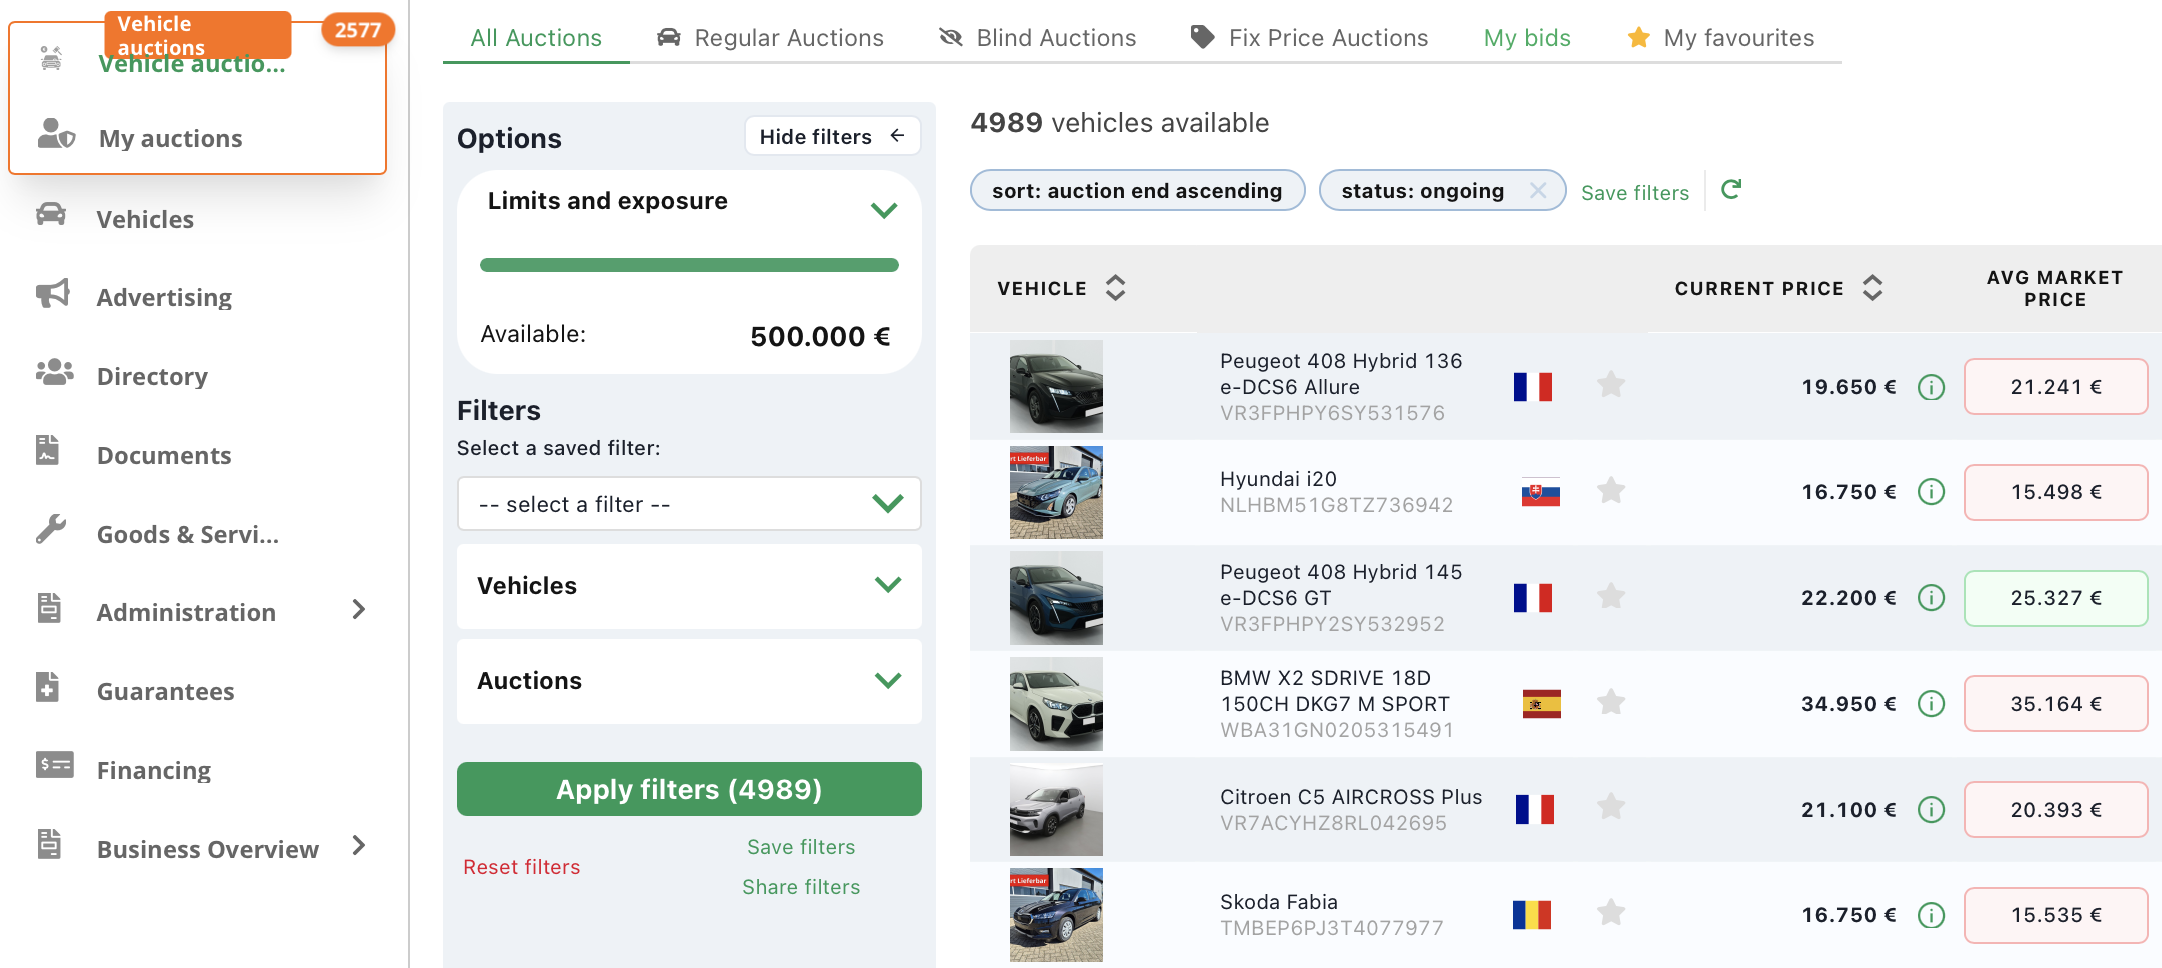
Why is it worth buying vehicles through AutoBrief auctions?
✅ Market price color indicator - the price in green or red, displayed next to the current purchase price, shows you whether the purchase is financially sensible given the vehicle's market prices.
✅ Informative calculation - even before submitting an offer, brokerage, transport and DMV costs are displayed. This way, you know how much the vehicle will cost you before purchasing it.
✅ You only pay for the vehicle upon delivery to the showroom - you settle the vehicle purchase cost when we deliver the vehicle to your dealership.
4 - Add the first vehicle
Click on the menu Vehicles and enter your inventory overview - this will be your main workspace.
Each vehicle comes with its own card, where all vehicle data is accessible - photos, purchase information, sales document, vehicle ads, and more. To make this data useful, we recommend that you try to enter as much vehicle data as possible from the very first vehicle entry.
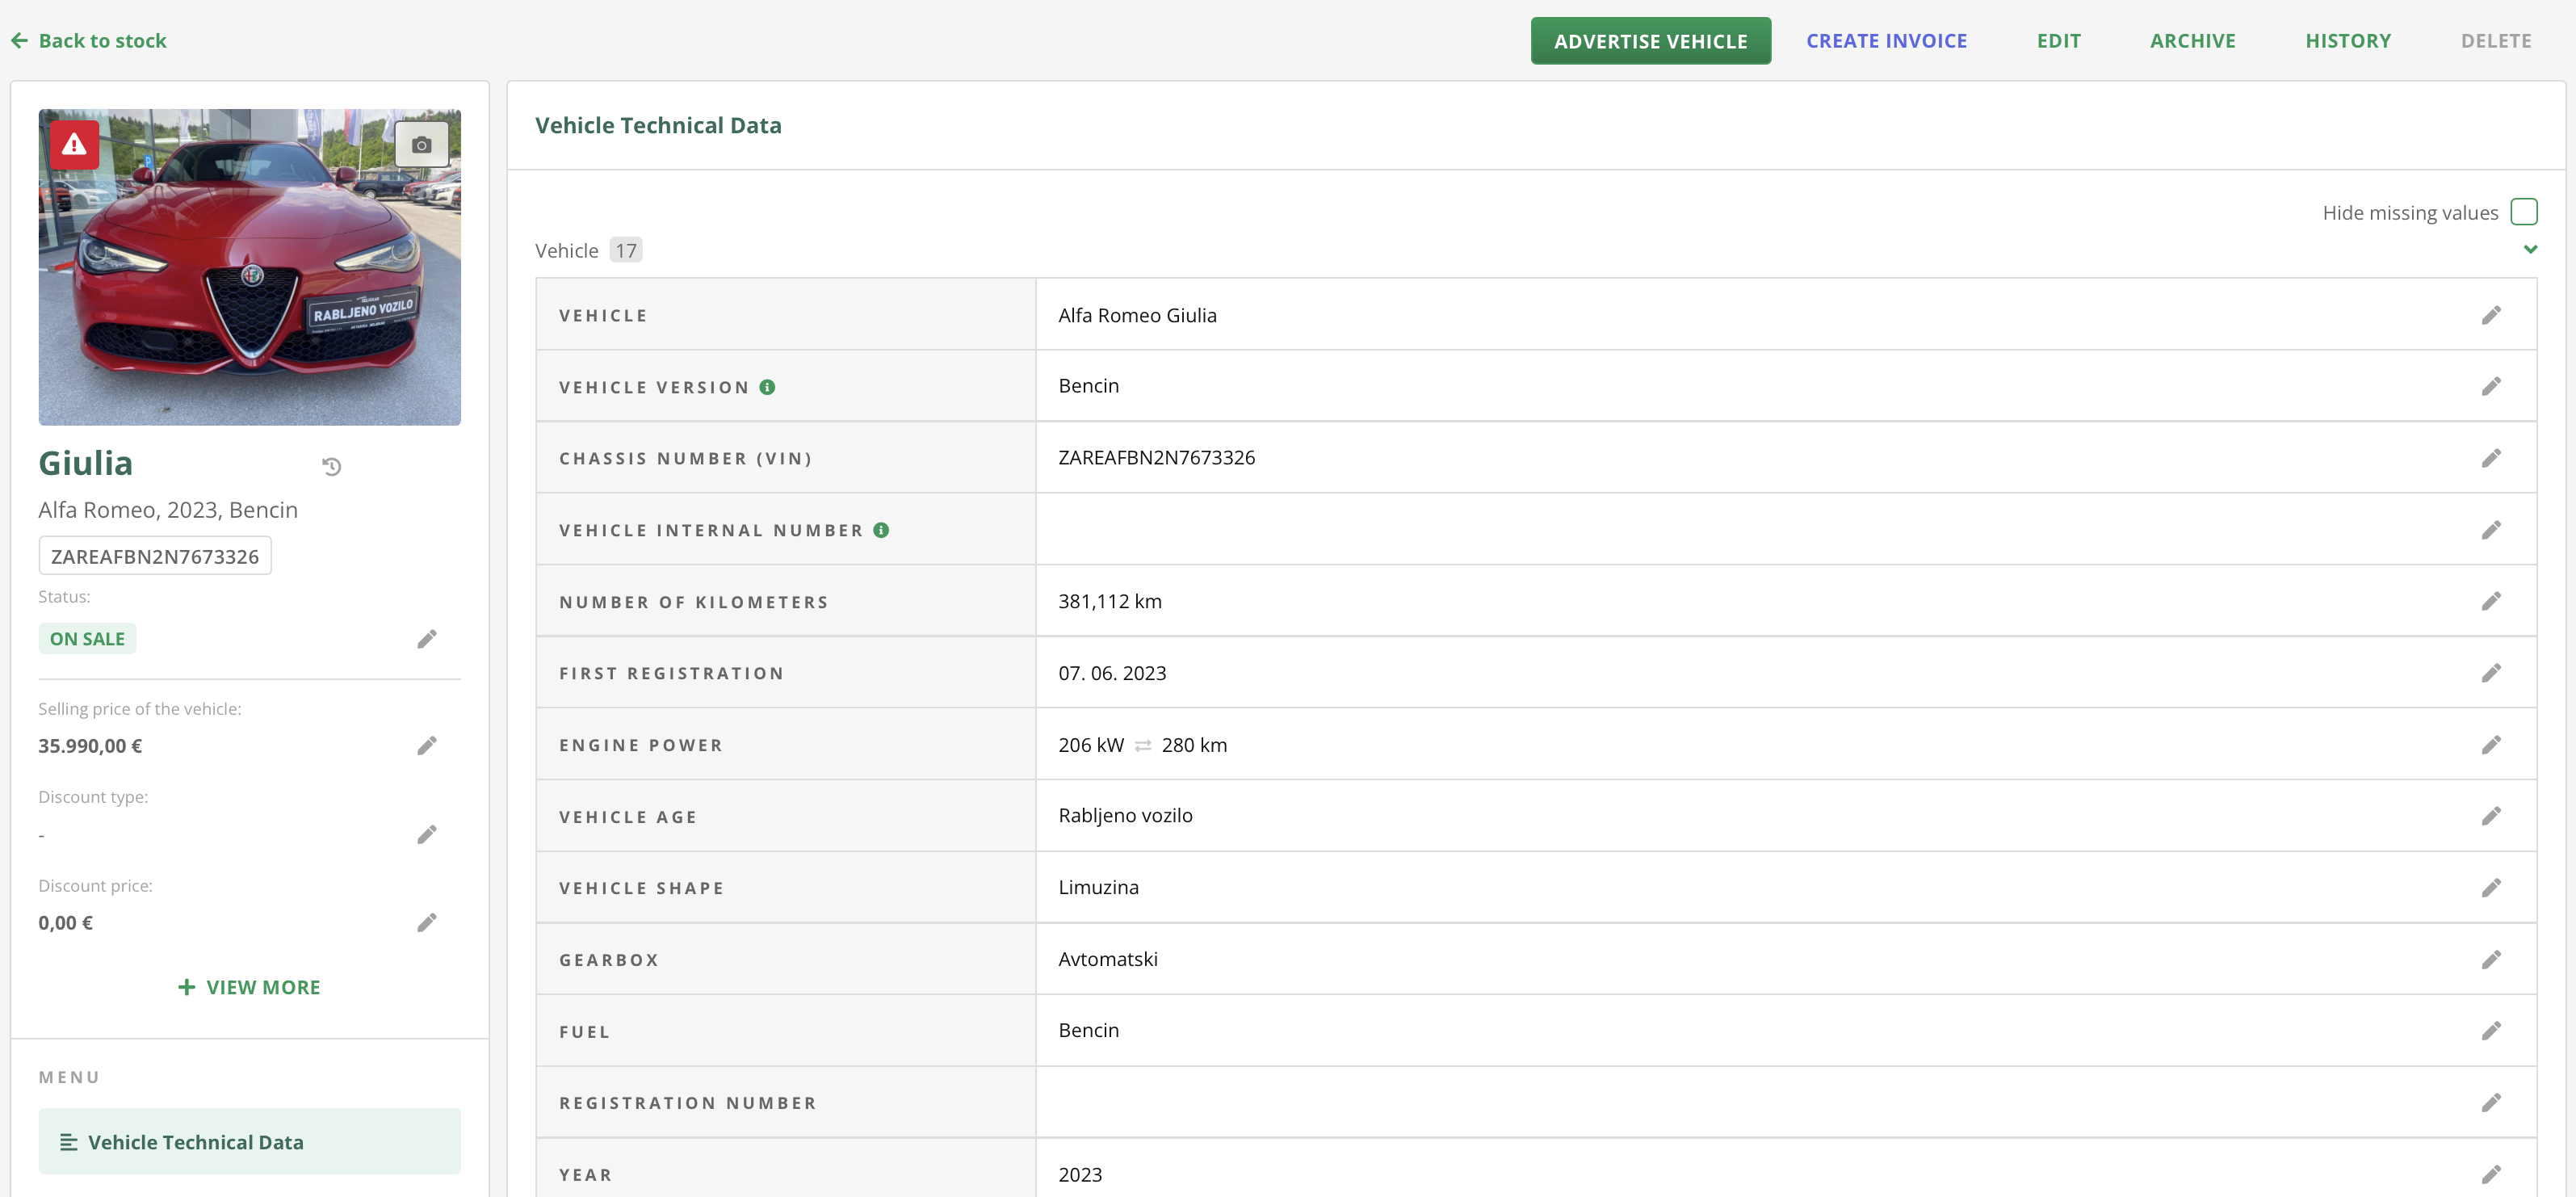
Instructions for adding the first vehicle.
5 - Enter vehicle inventory
When you get a new vehicle, enter it into the system immediately. We suggest entering vehicles into AutoBrief gradually - with each new vehicle. This way, it won't be too demanding from the start.
If you have inventory and data in an Excel file or another program, you can transfer the entire inventory at once. You do this under the tab DOWNLOADED FROM, by clicking on Import the list of vehicles.
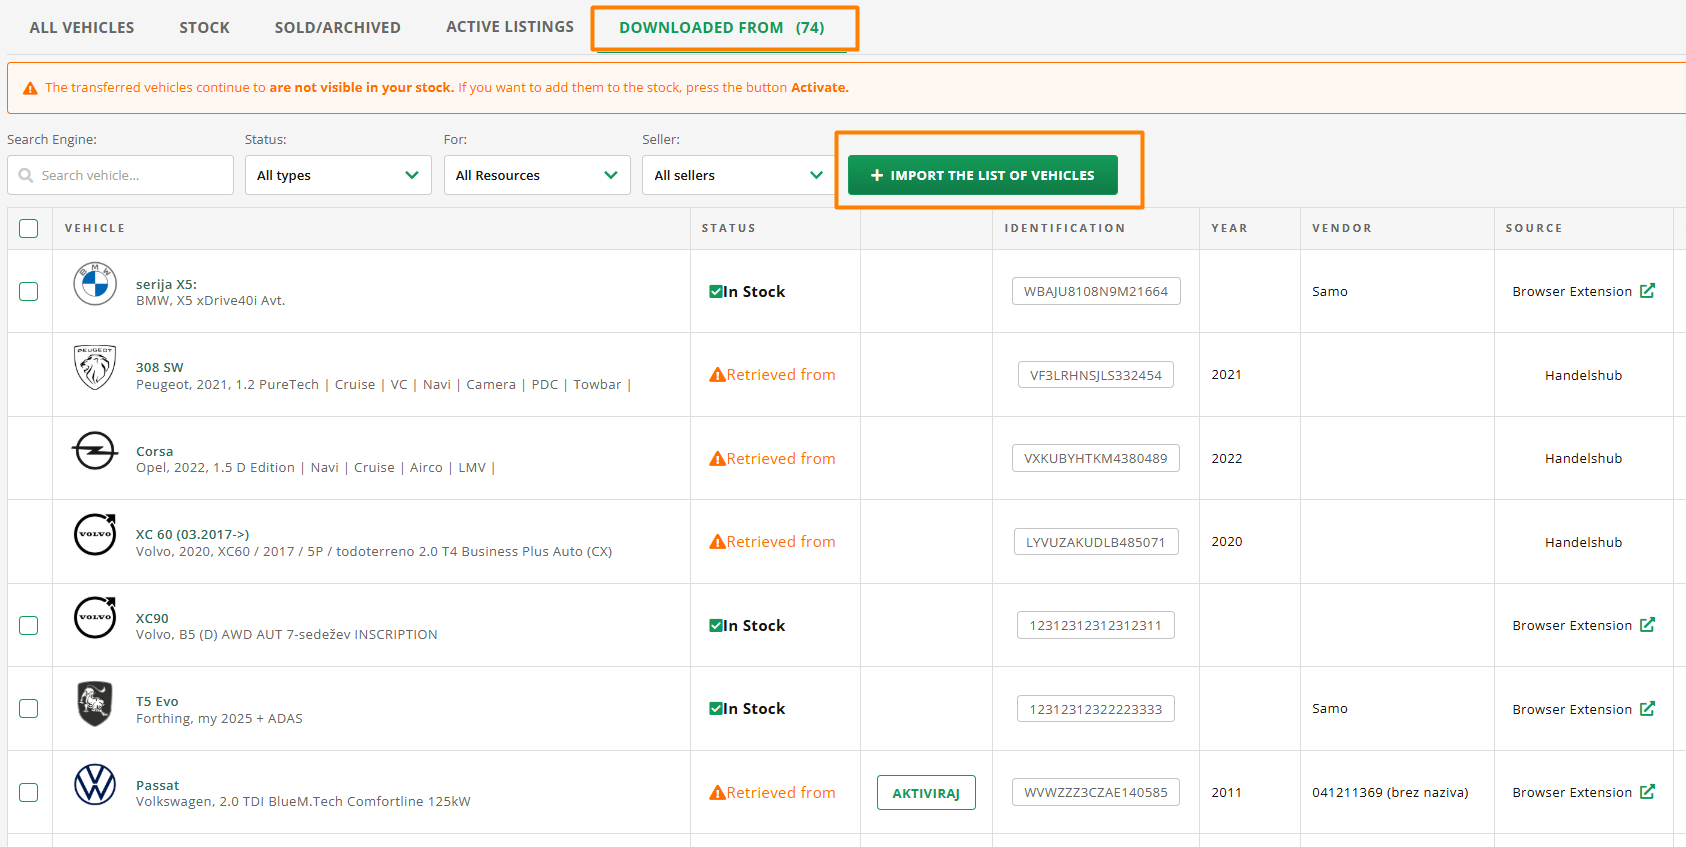
Instructions for entering vehicle inventory.
6 - Find help and additional instructions
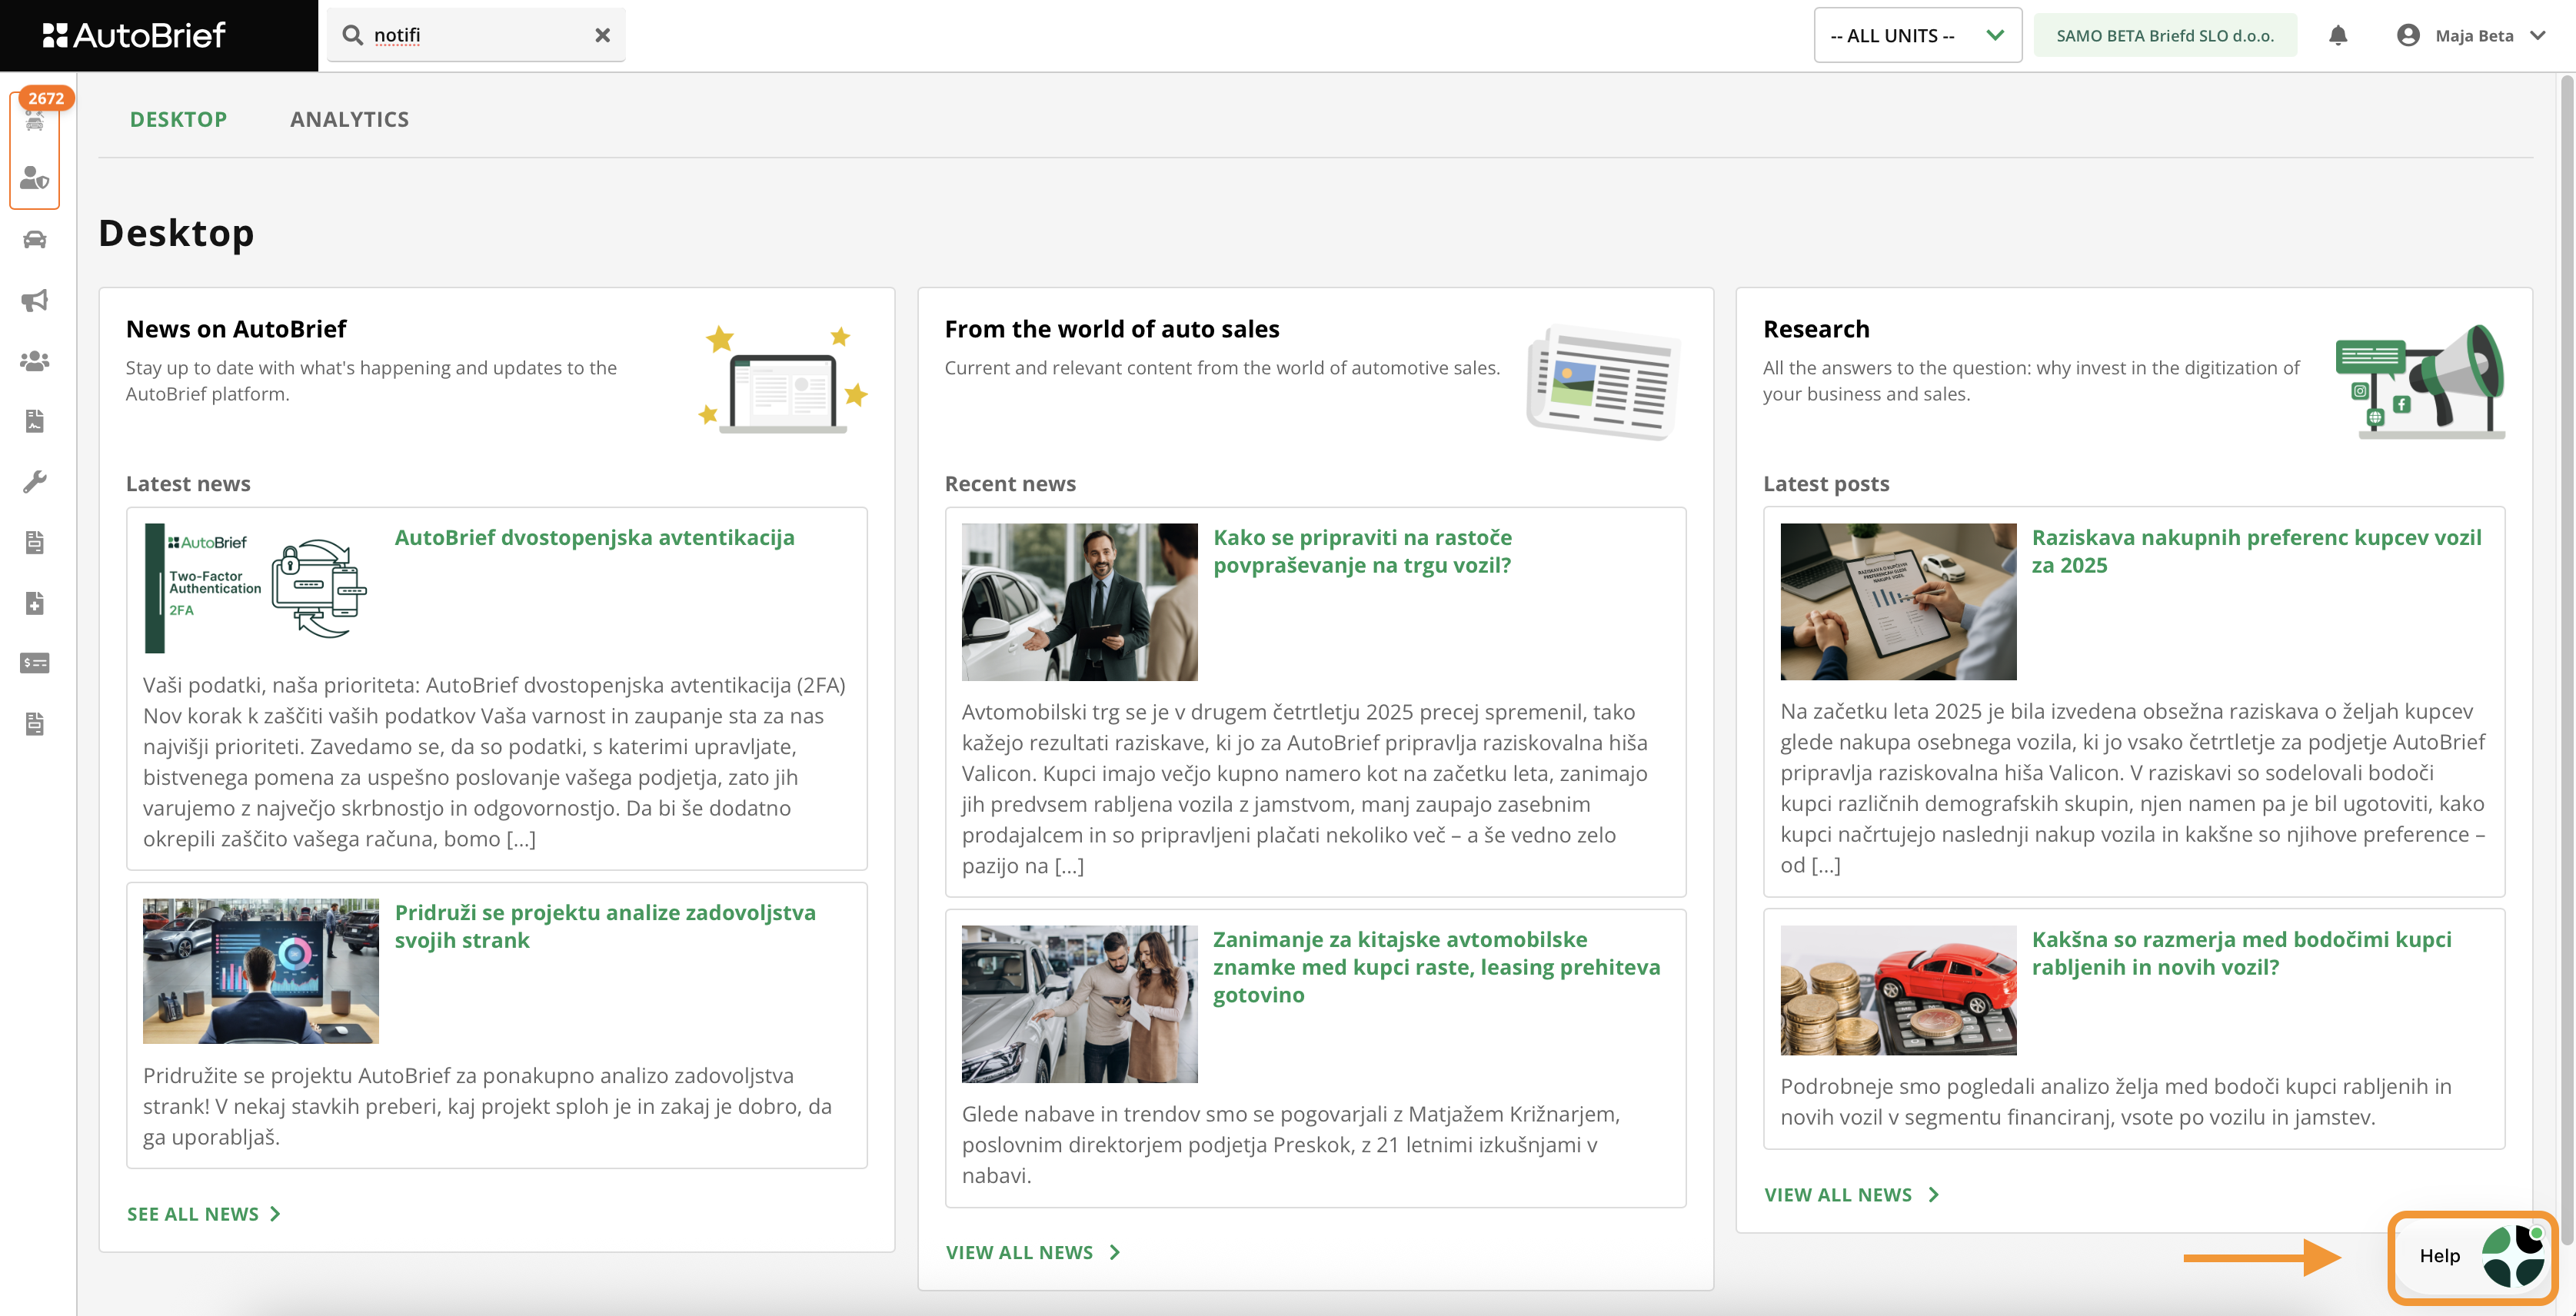
For an easier start, we recommend exploring the Help window.
You can find the help window in the bottom right corner of the screen. Here we have prepared manuals, news, and usage instructions for you. If you need additional help, you can also contact our team.
Once you switch from papers, Excel files, and various programs to one system, work will become faster, more transparent, and much less stressful. However, we understand that initial adjustment may take some time, so we advise you:
- Explore as many functionalities as AutoBrief has to offer.
- Ask whenever you need help - we are here to assist you.
What else we recommend you explore:
1. Digital Advertising
You can publish every vehicle on various advertising portals directly via AutoBrief.
2. New vehicle just arrived?
Try the mobile application Carpeak, which guides you through vehicle photography, edits pictures and background, and automatically adds the vehicle to your inventory.
→ This way you can skip step 5!
3. Use the Administration module
Available in Starter and Pro packages - enables issuing invoices, pro forma invoices, business overview, and more.